First off, a big Thank you to my sponsor Belltech for providing me with the suspension components to upgrade the ride quality and performance of my suspension, with that lets proceed.
Click on pictures to view full sized. Use back button on your browser to return.
In my last vehicle upgrade post I replaced my shocks with the new Belltech Street Performance shocks, I did not have all the components for the entire suspension upgrade at the time so I just did the shocks. The Street Performance shocks alone made a noticeable difference in the ride quality and handling characteristics of my truck.
Now for part 2 of my Belltech suspension upgrade. When I inked my sponsorship from Belltech I was asked how low I wanted to go. In the past I had considered lowering my truck but seeing how I go fishing while hauling a bass boat as well as driving down dirt roads I needed the ground clearance when I went off road. While I’m sure I could have gone lower I opted the 2/2 kit to lower my center of gravity a little to improve the handling. The fact that the lower stance looks nice is an added benefit.
For my system I got the Spindles, part number 2508 for the front end and shackles, part 6400 for the rear as well as the Sway Bar set part number 5405. These part number listed are for my 2005 ECSB with the Silverado Performance Package. It is basically a 2wd SS without the SS accents. Also known as the VHO, for the motor which is the Vortec High Output 6.0 LQ9.
For my installation I contacted Guy at AV Sport Truck & Off Road Center in Lancaster CA to arrange the installation. Lancaster is about 90 miles to the south of me and the wife wanted to do some shopping so we decided to make a day out of it.
Here is a picture of my truck sitting in front of his shop prior to the installation of my Belltech 2/2 drop.
The installation is pretty straight forward and the directions that are provided make it very simple so I won’t go into too much detail on the specifics.
Lets start with the front spindles. First of course you must remove the stock spindles. This will include the brake caliper and rotor as well as the hub to 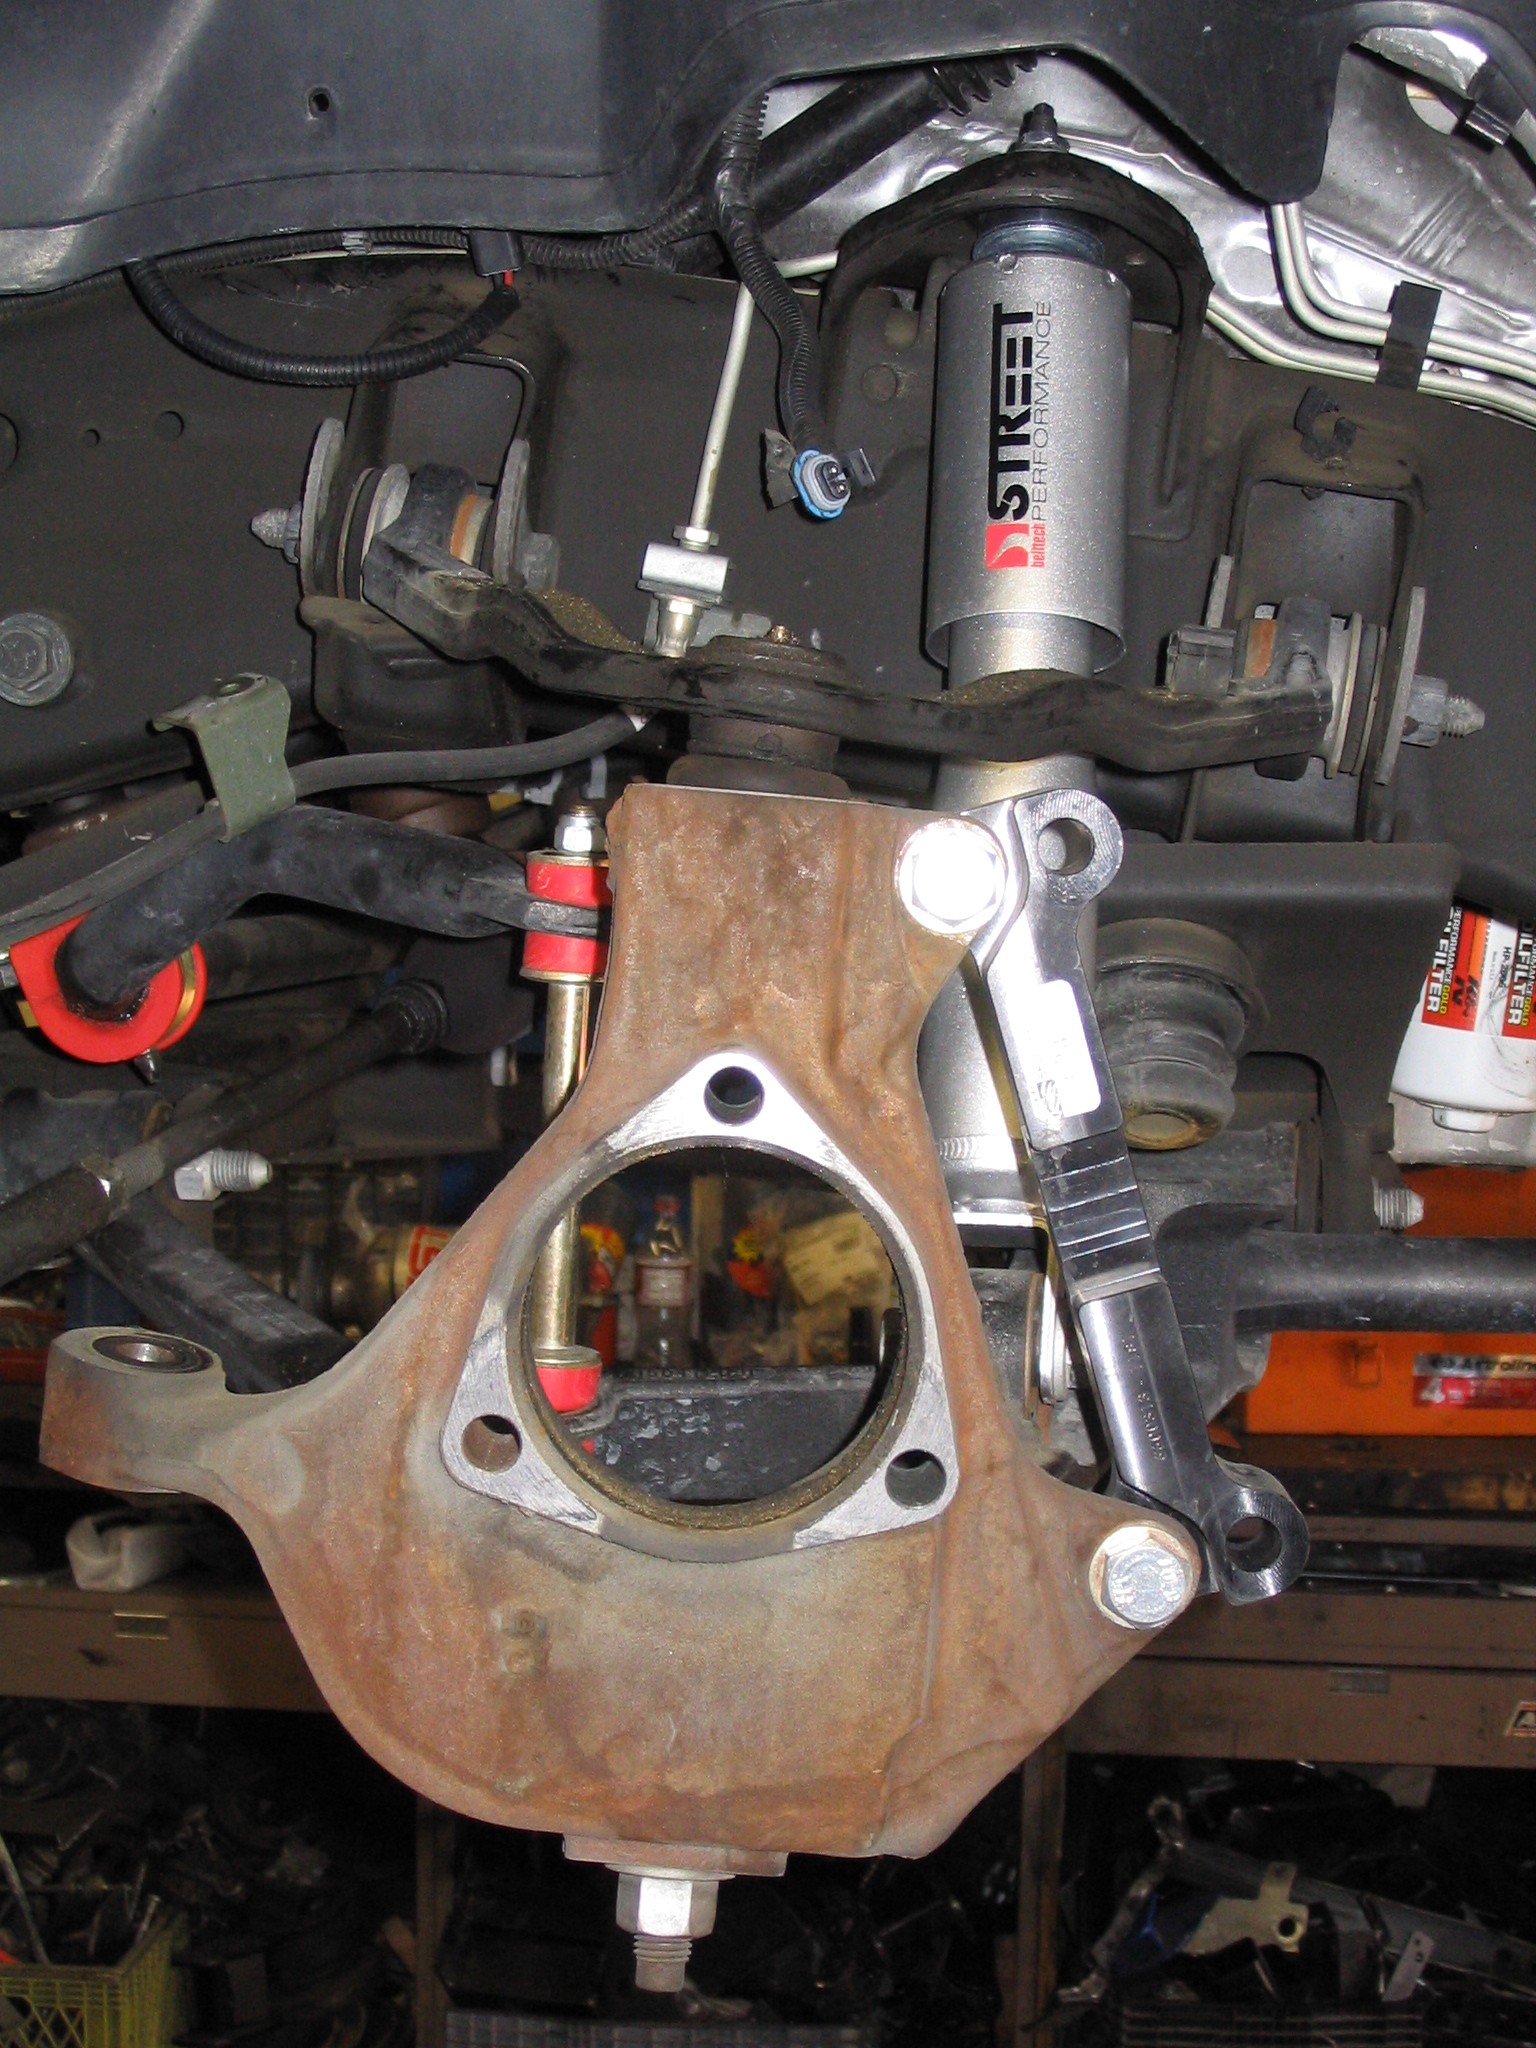 get to the spindle. The extra bracket you see is the caliper relocation bracket for my Baer Eradispeed Plus 1 braking system.
Here we have a side by side view of the stock spindle and the Belltech 2508 spindle. You can see the difference between the 2.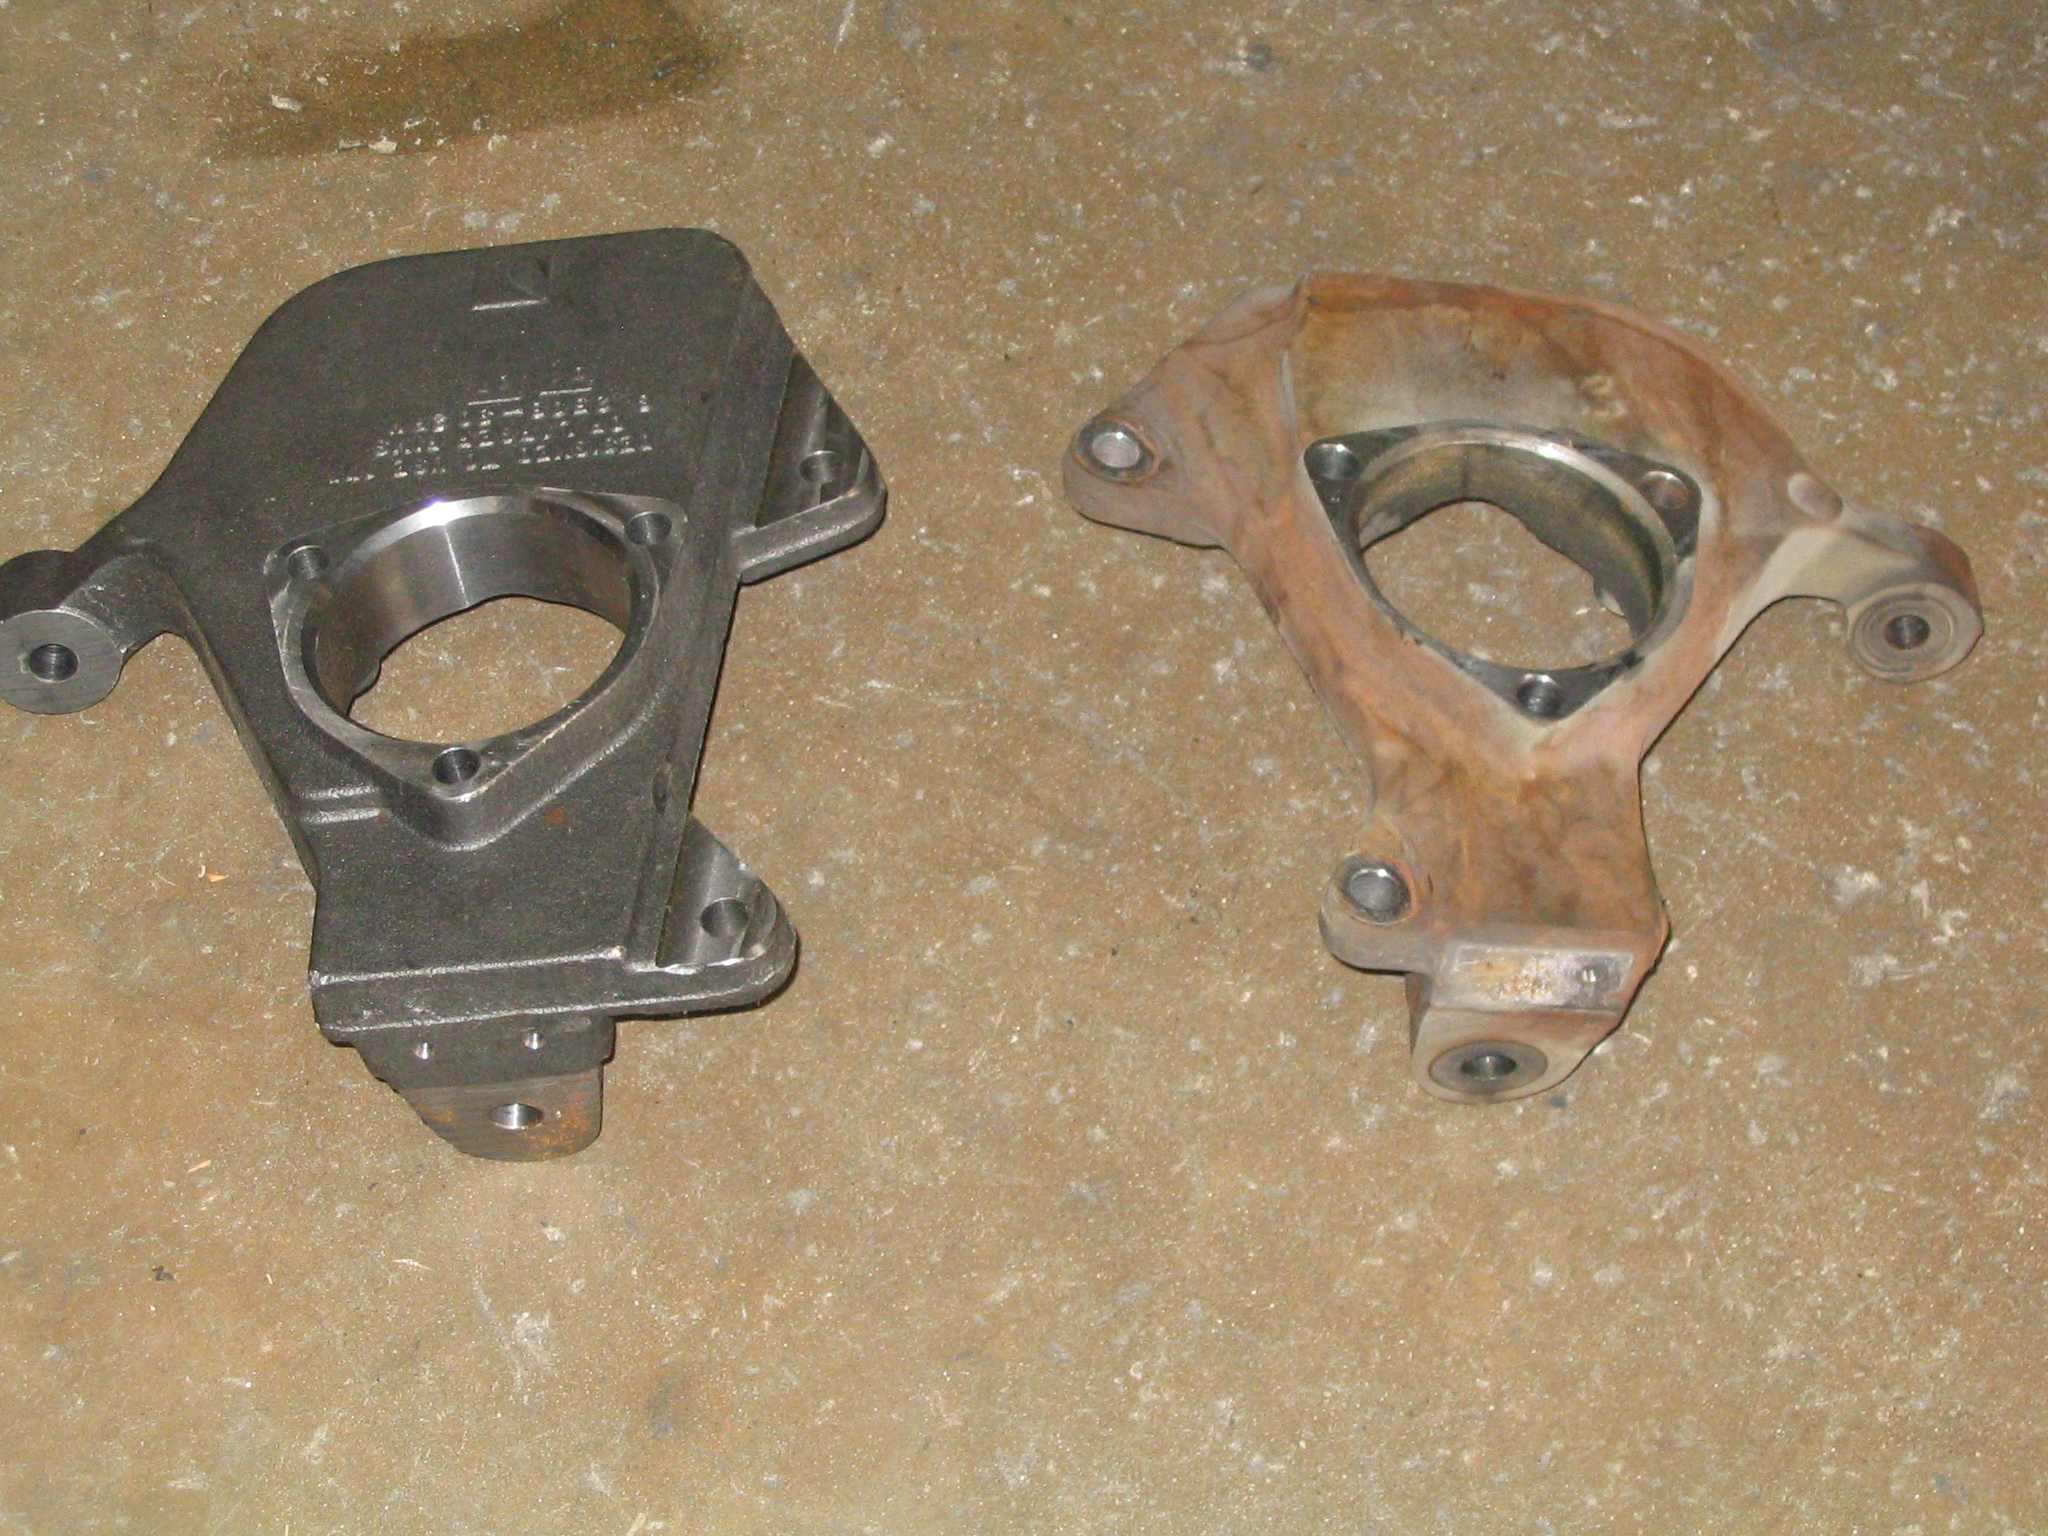
The only issue we ran into was the splash shield needed to be slightly trimmed, this was not because of the Belltech Spindles, it was due to the caliper relocation bracket’s lower bolt not being able to go in. Not a problem, a dremel with a cut off wheel and about 1 minute and the installation process went on.
Here is a picture of the completed 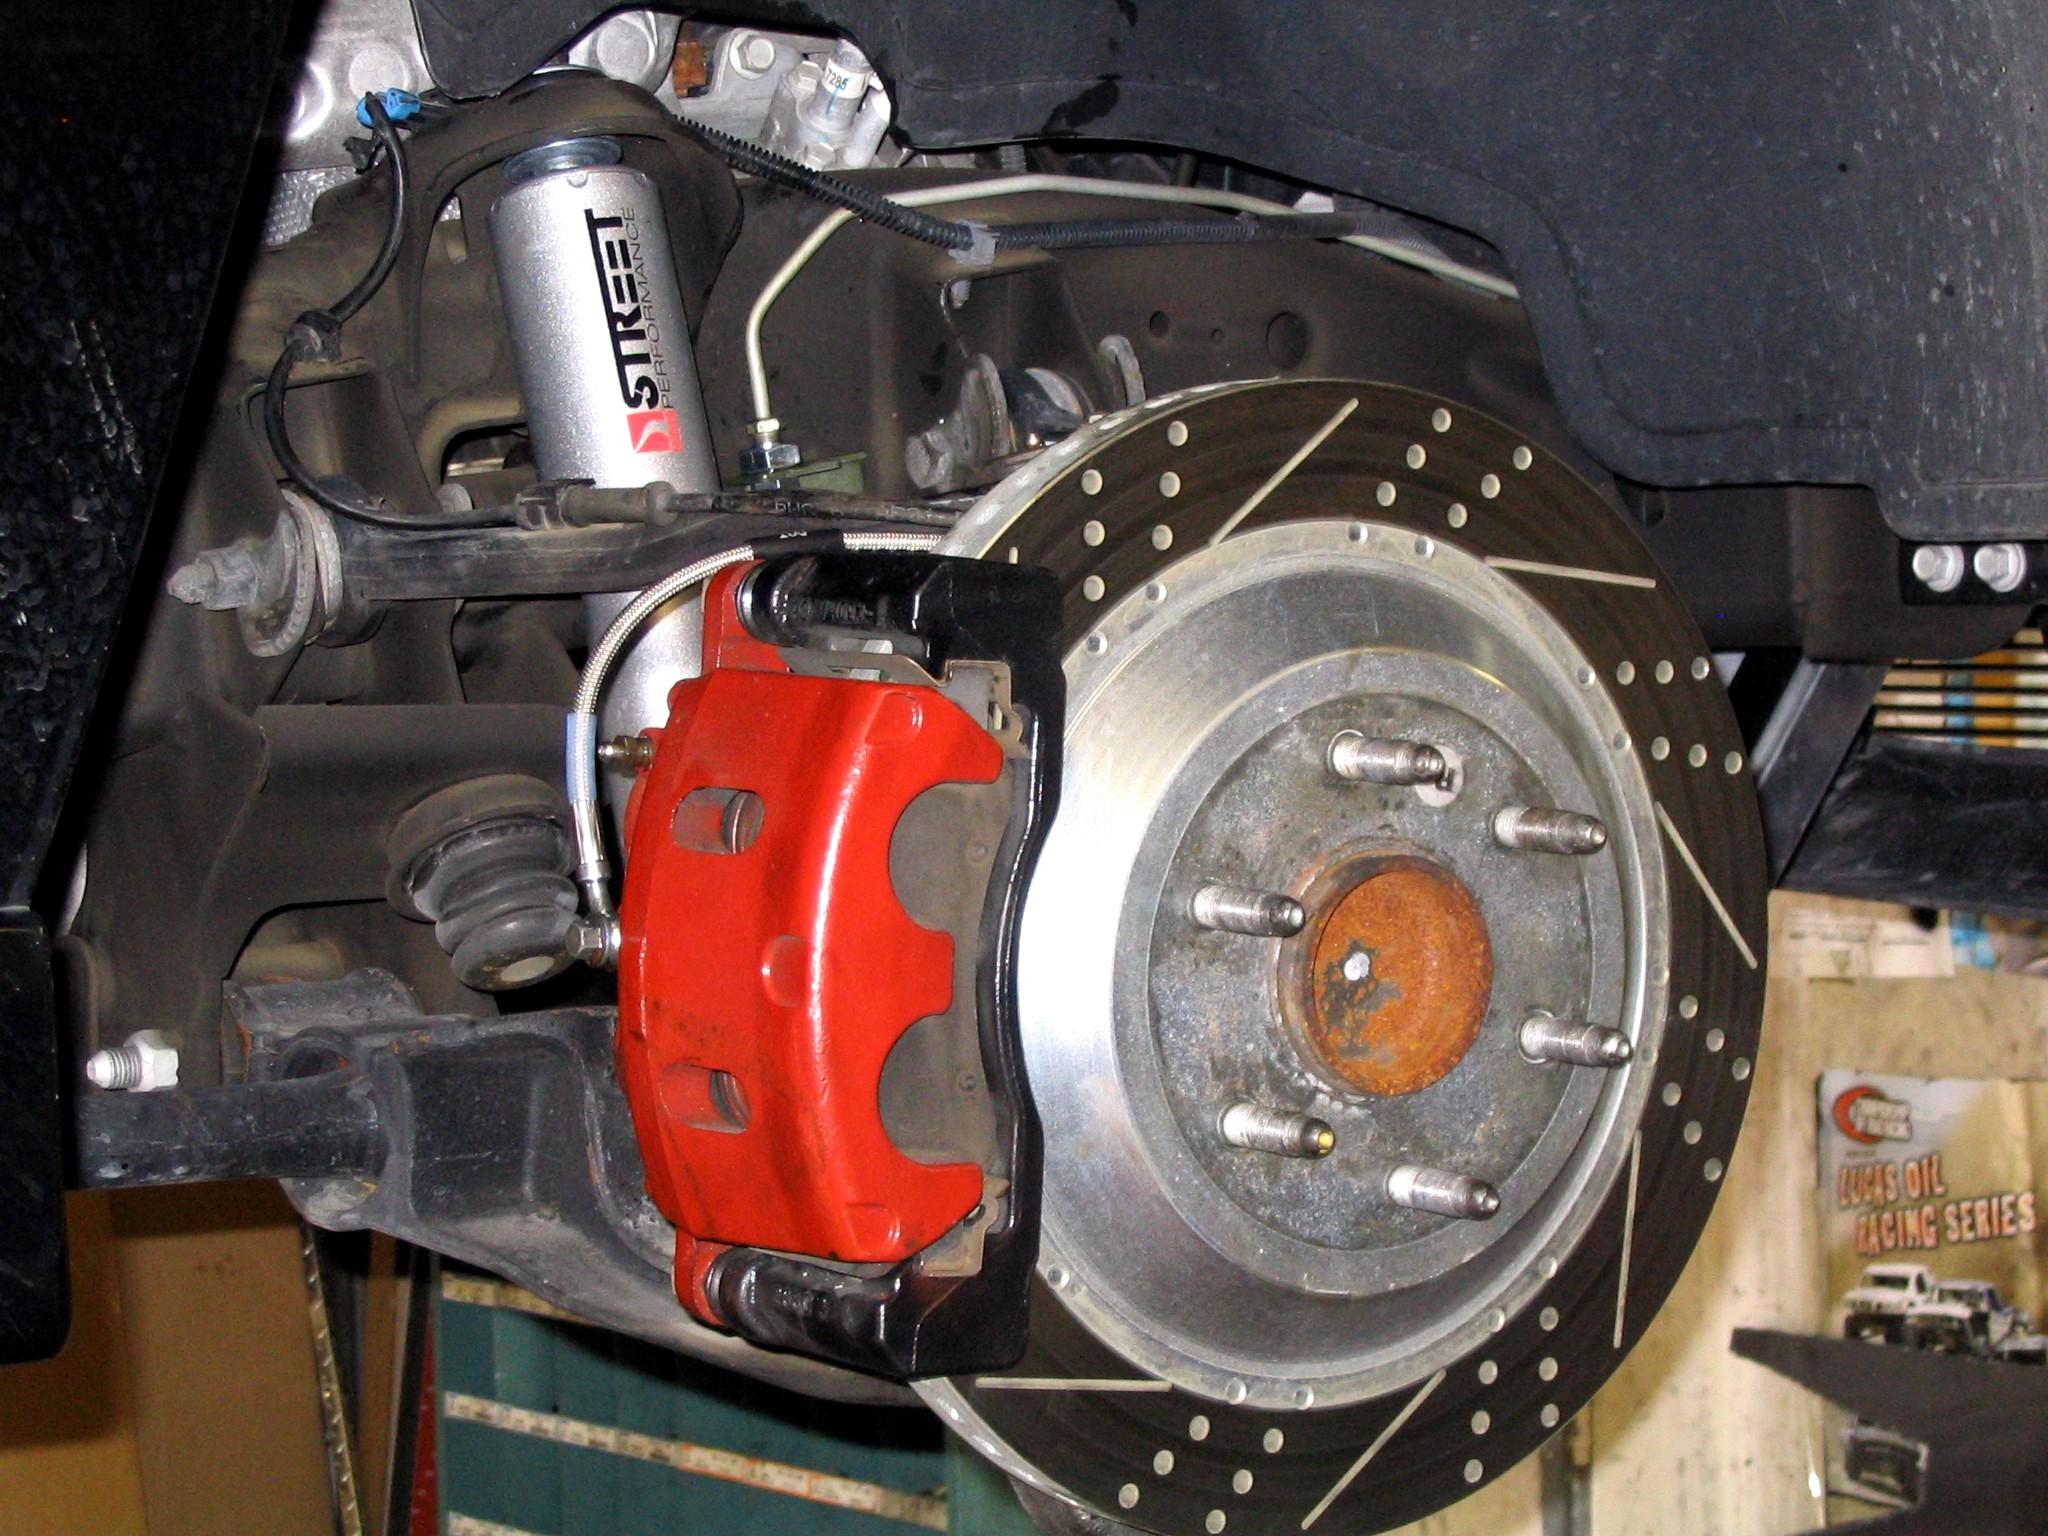 spindle install, for those that noticed, yes I installed some stainless steel brake lines while I was at it.
On to the rear shackle install. This process was very simple, swap out the stock shackles with the Belltech ones. If you have a tow hitch removing it makes the removal and install of the shackles much easier.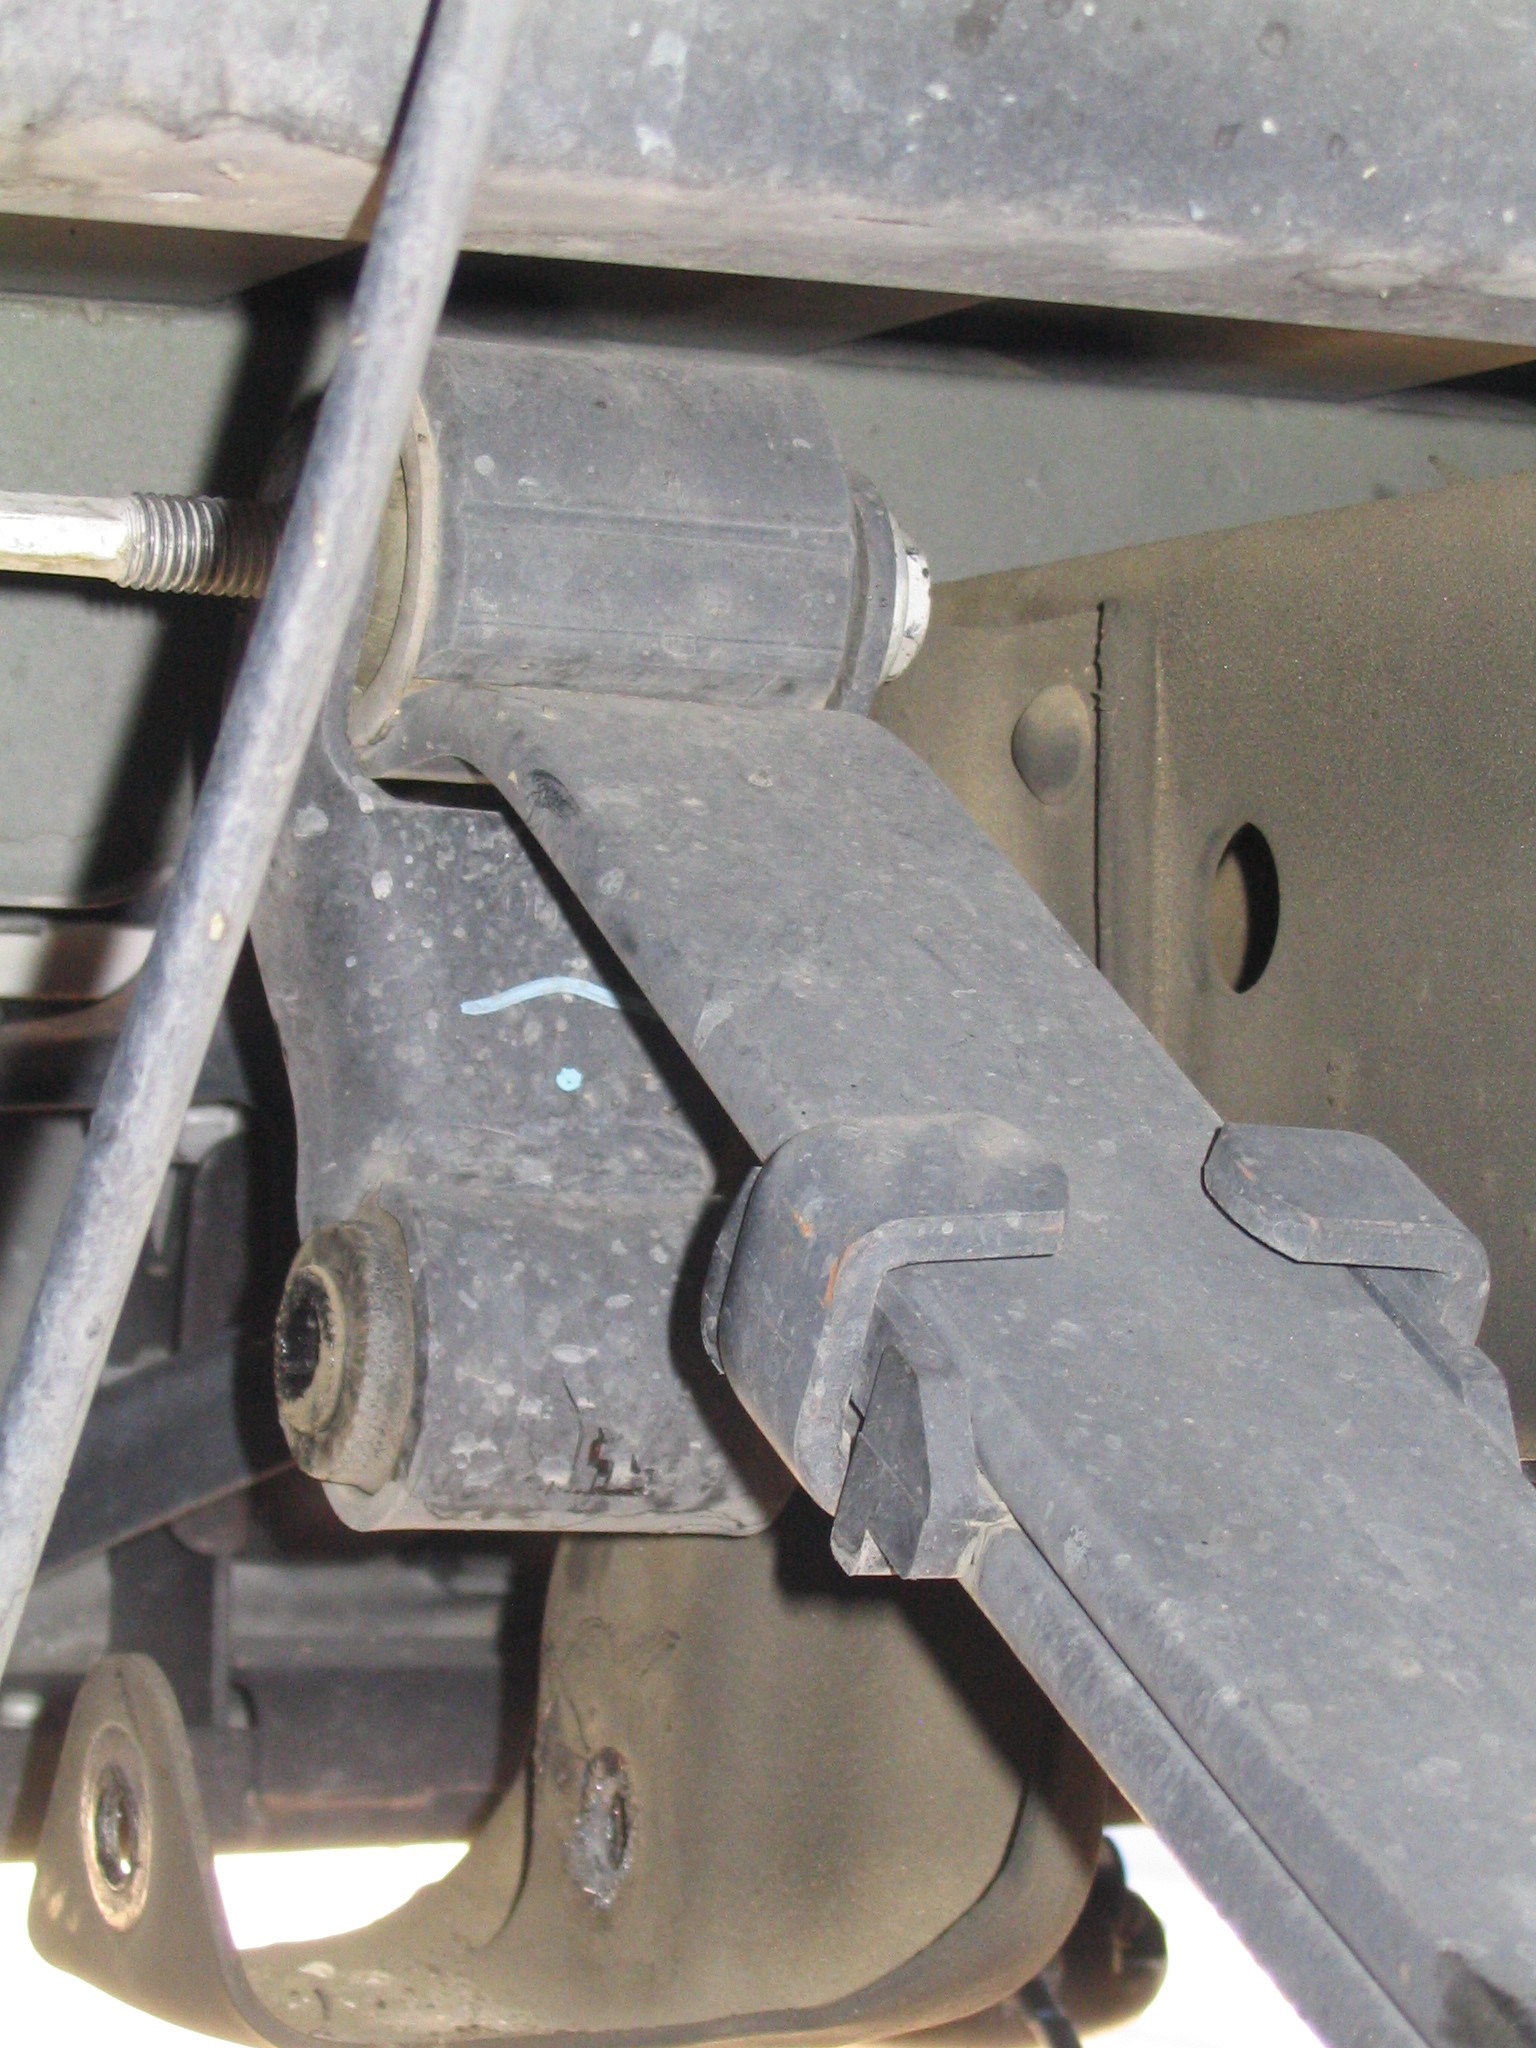
Here is the stock shackle being removed.
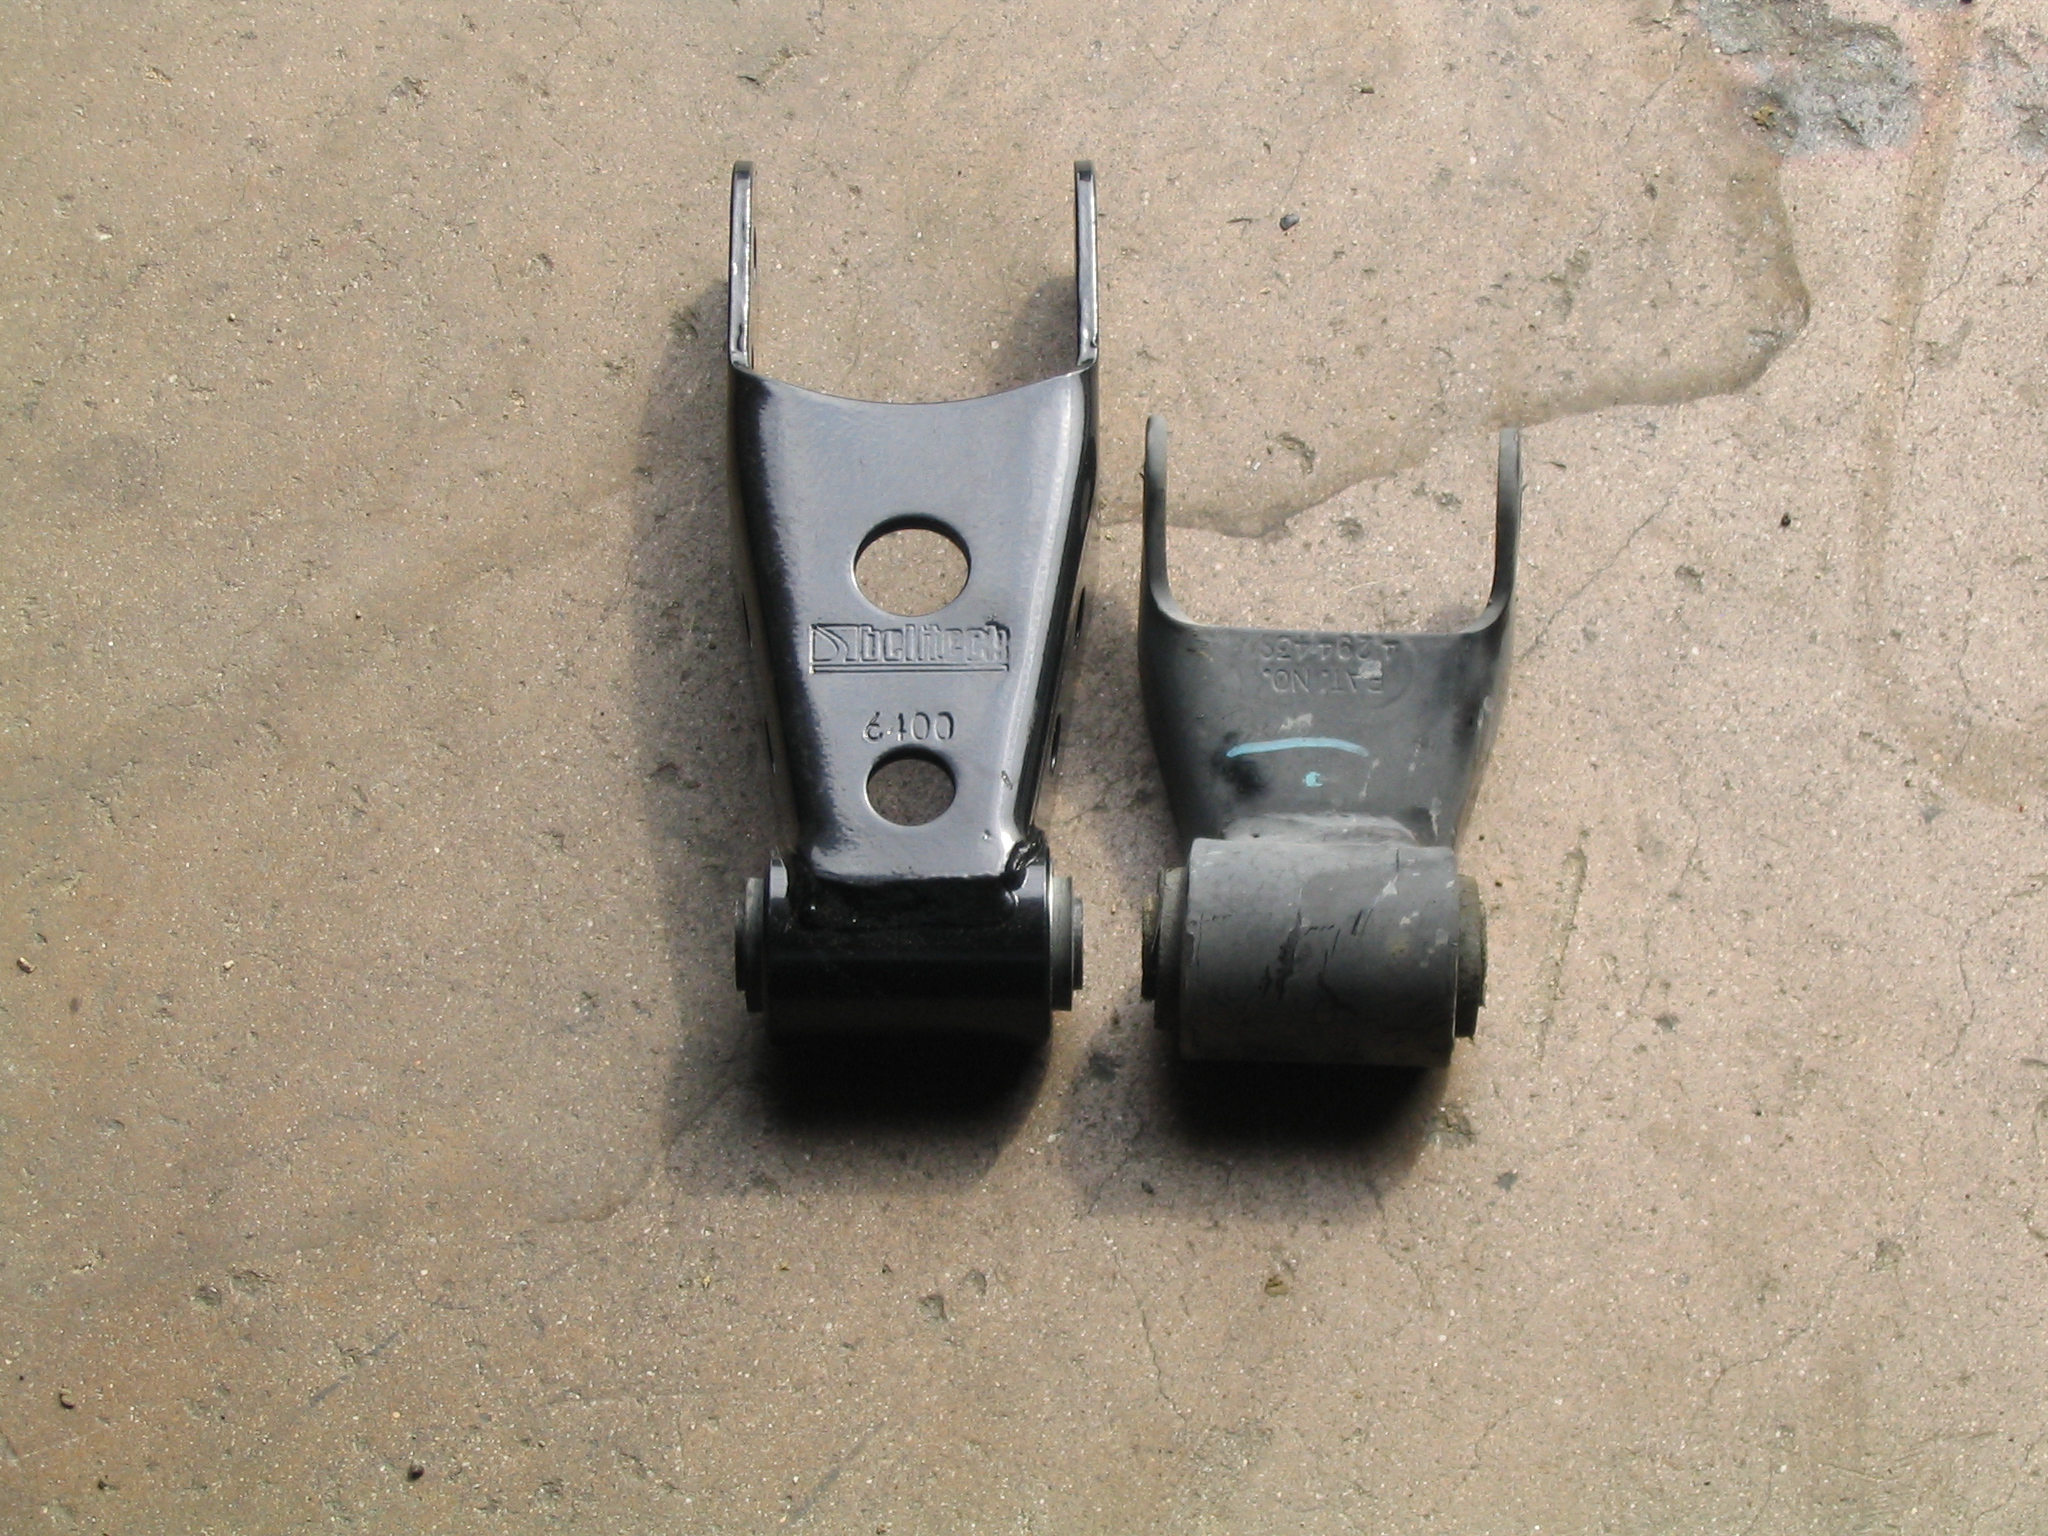 Here is a comparison of the Belltech and stock shackle
About the only thing I suggest you watch for is to be sure to follow the directions as to the shackle install orientation. While it may appear wrong, look like they are backwards, it is not. This was something that Doug, the installer, told me was a common made mistake. Bottom line, put the new shackles in the same way the old shackles were before you removed them. Here we have the Belltech shackle installed.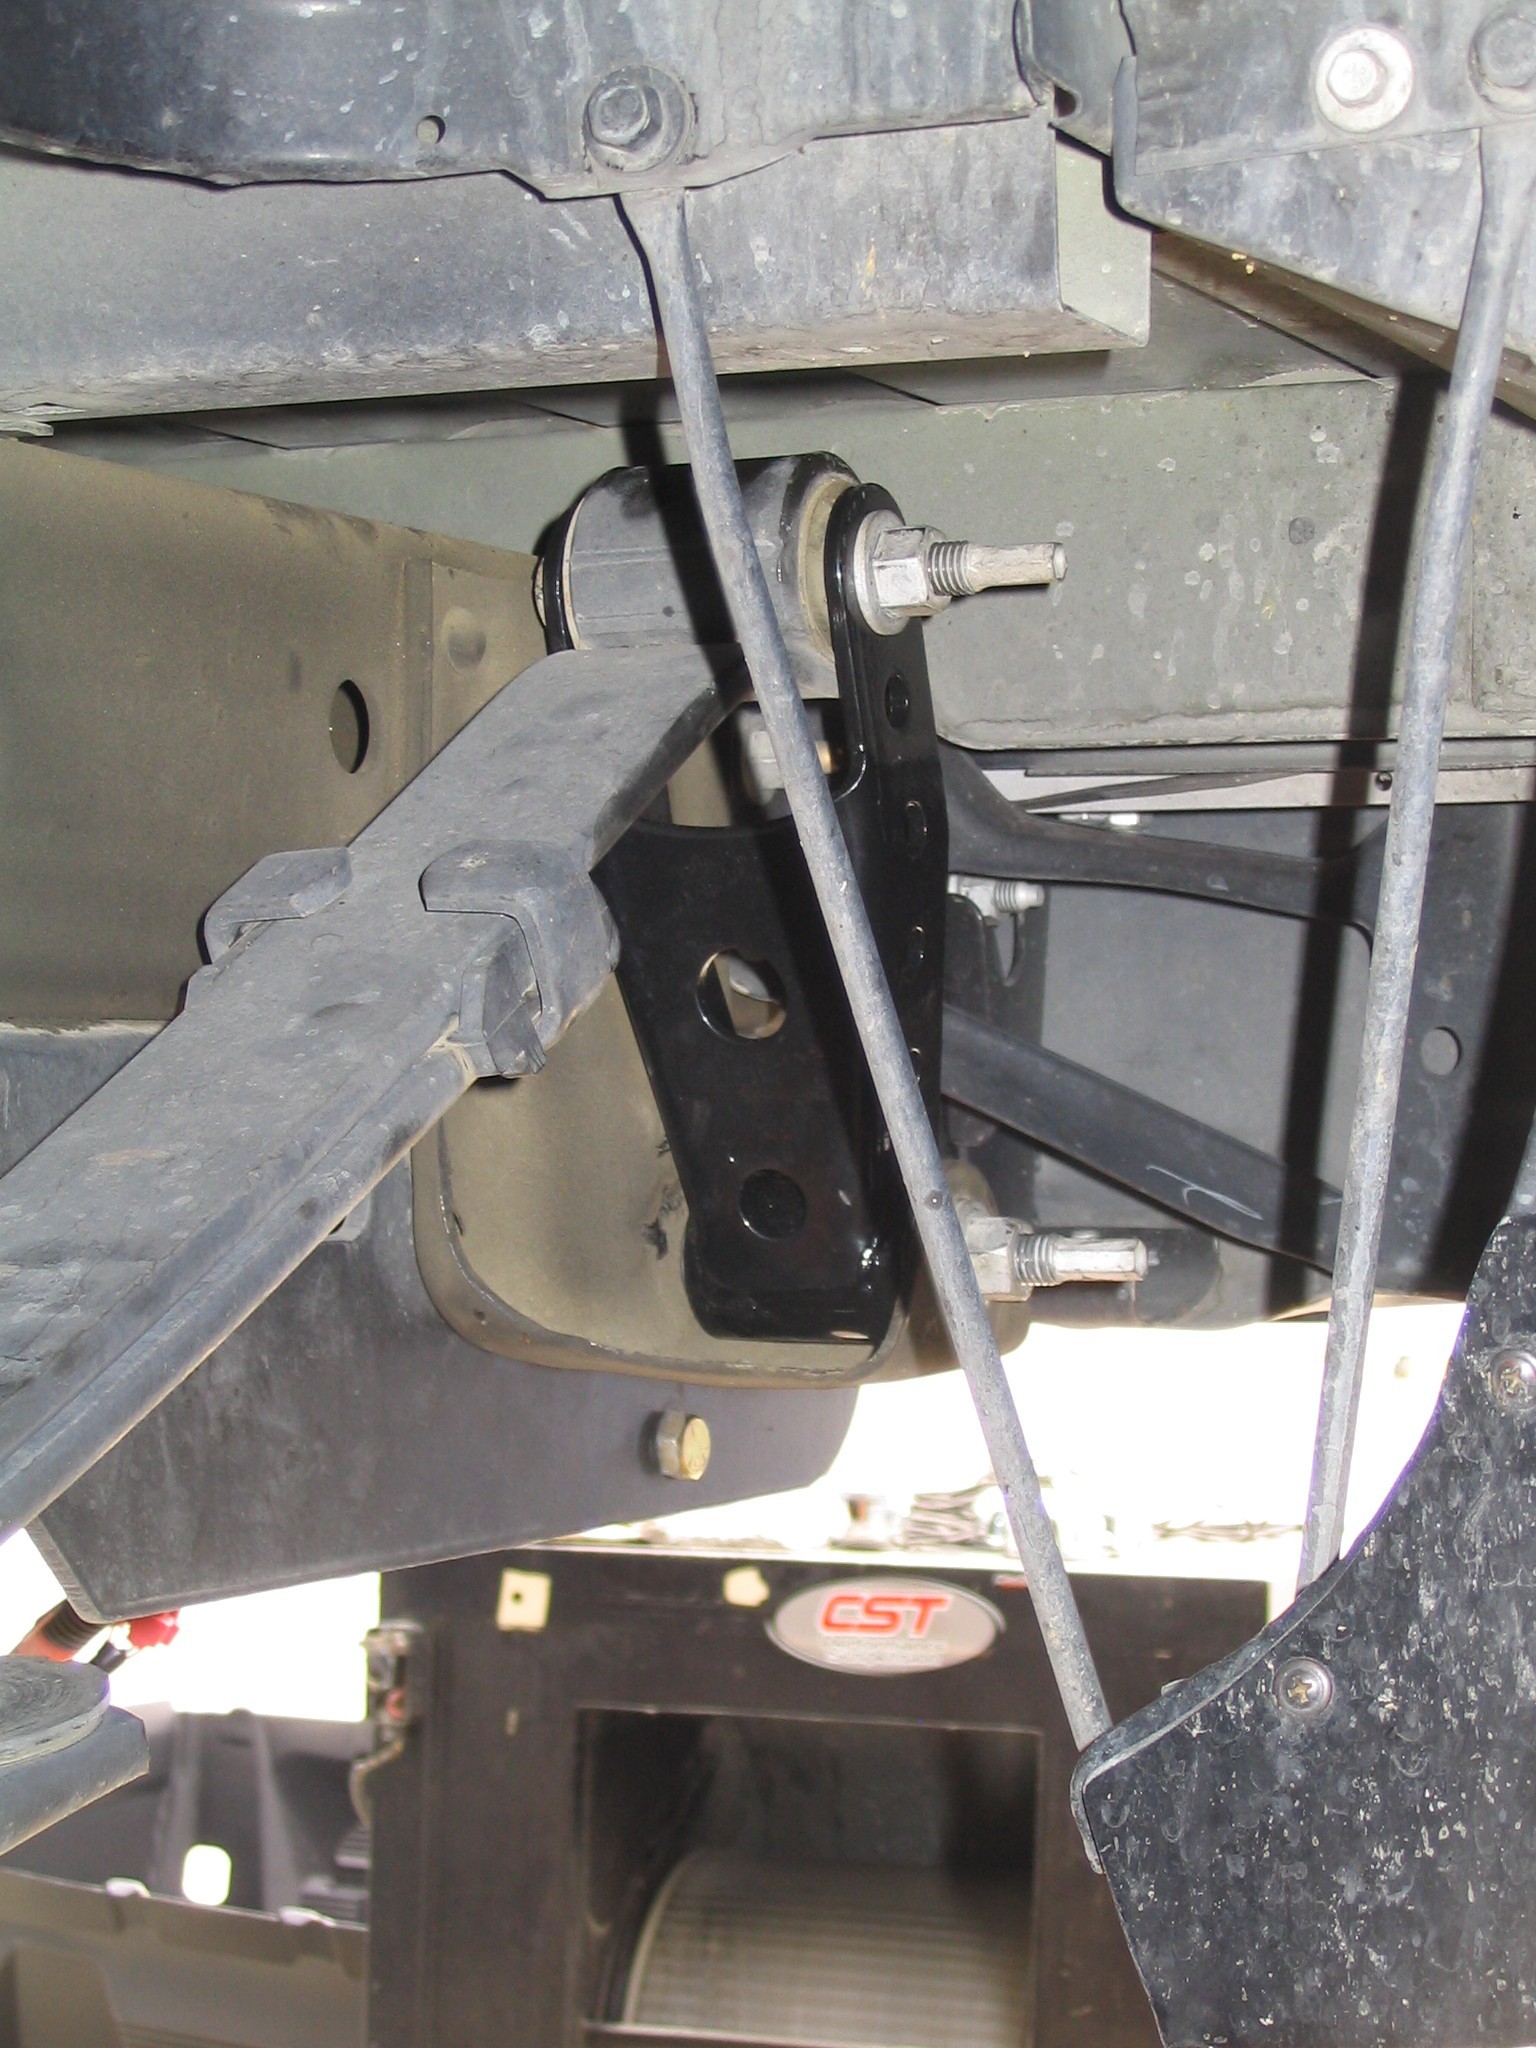
That’s pretty much it. The total time for install was not quite 2 hours total, then again AV Sport Truck specializes in the type of install so they knew all of the little issues they might encounter along the way. The included install instructions are very well laid out and make the install pretty simple. I believe that if a person were to tackle this job it would probably take maybe 4 hours, as long as they have the correct tools.
Another thing worth mentioning is when you install any new spindles it will alter your front end alignment so be sure to have a front end alignment done as soon as possible to avoid the front end wobble and uneven tire wear.
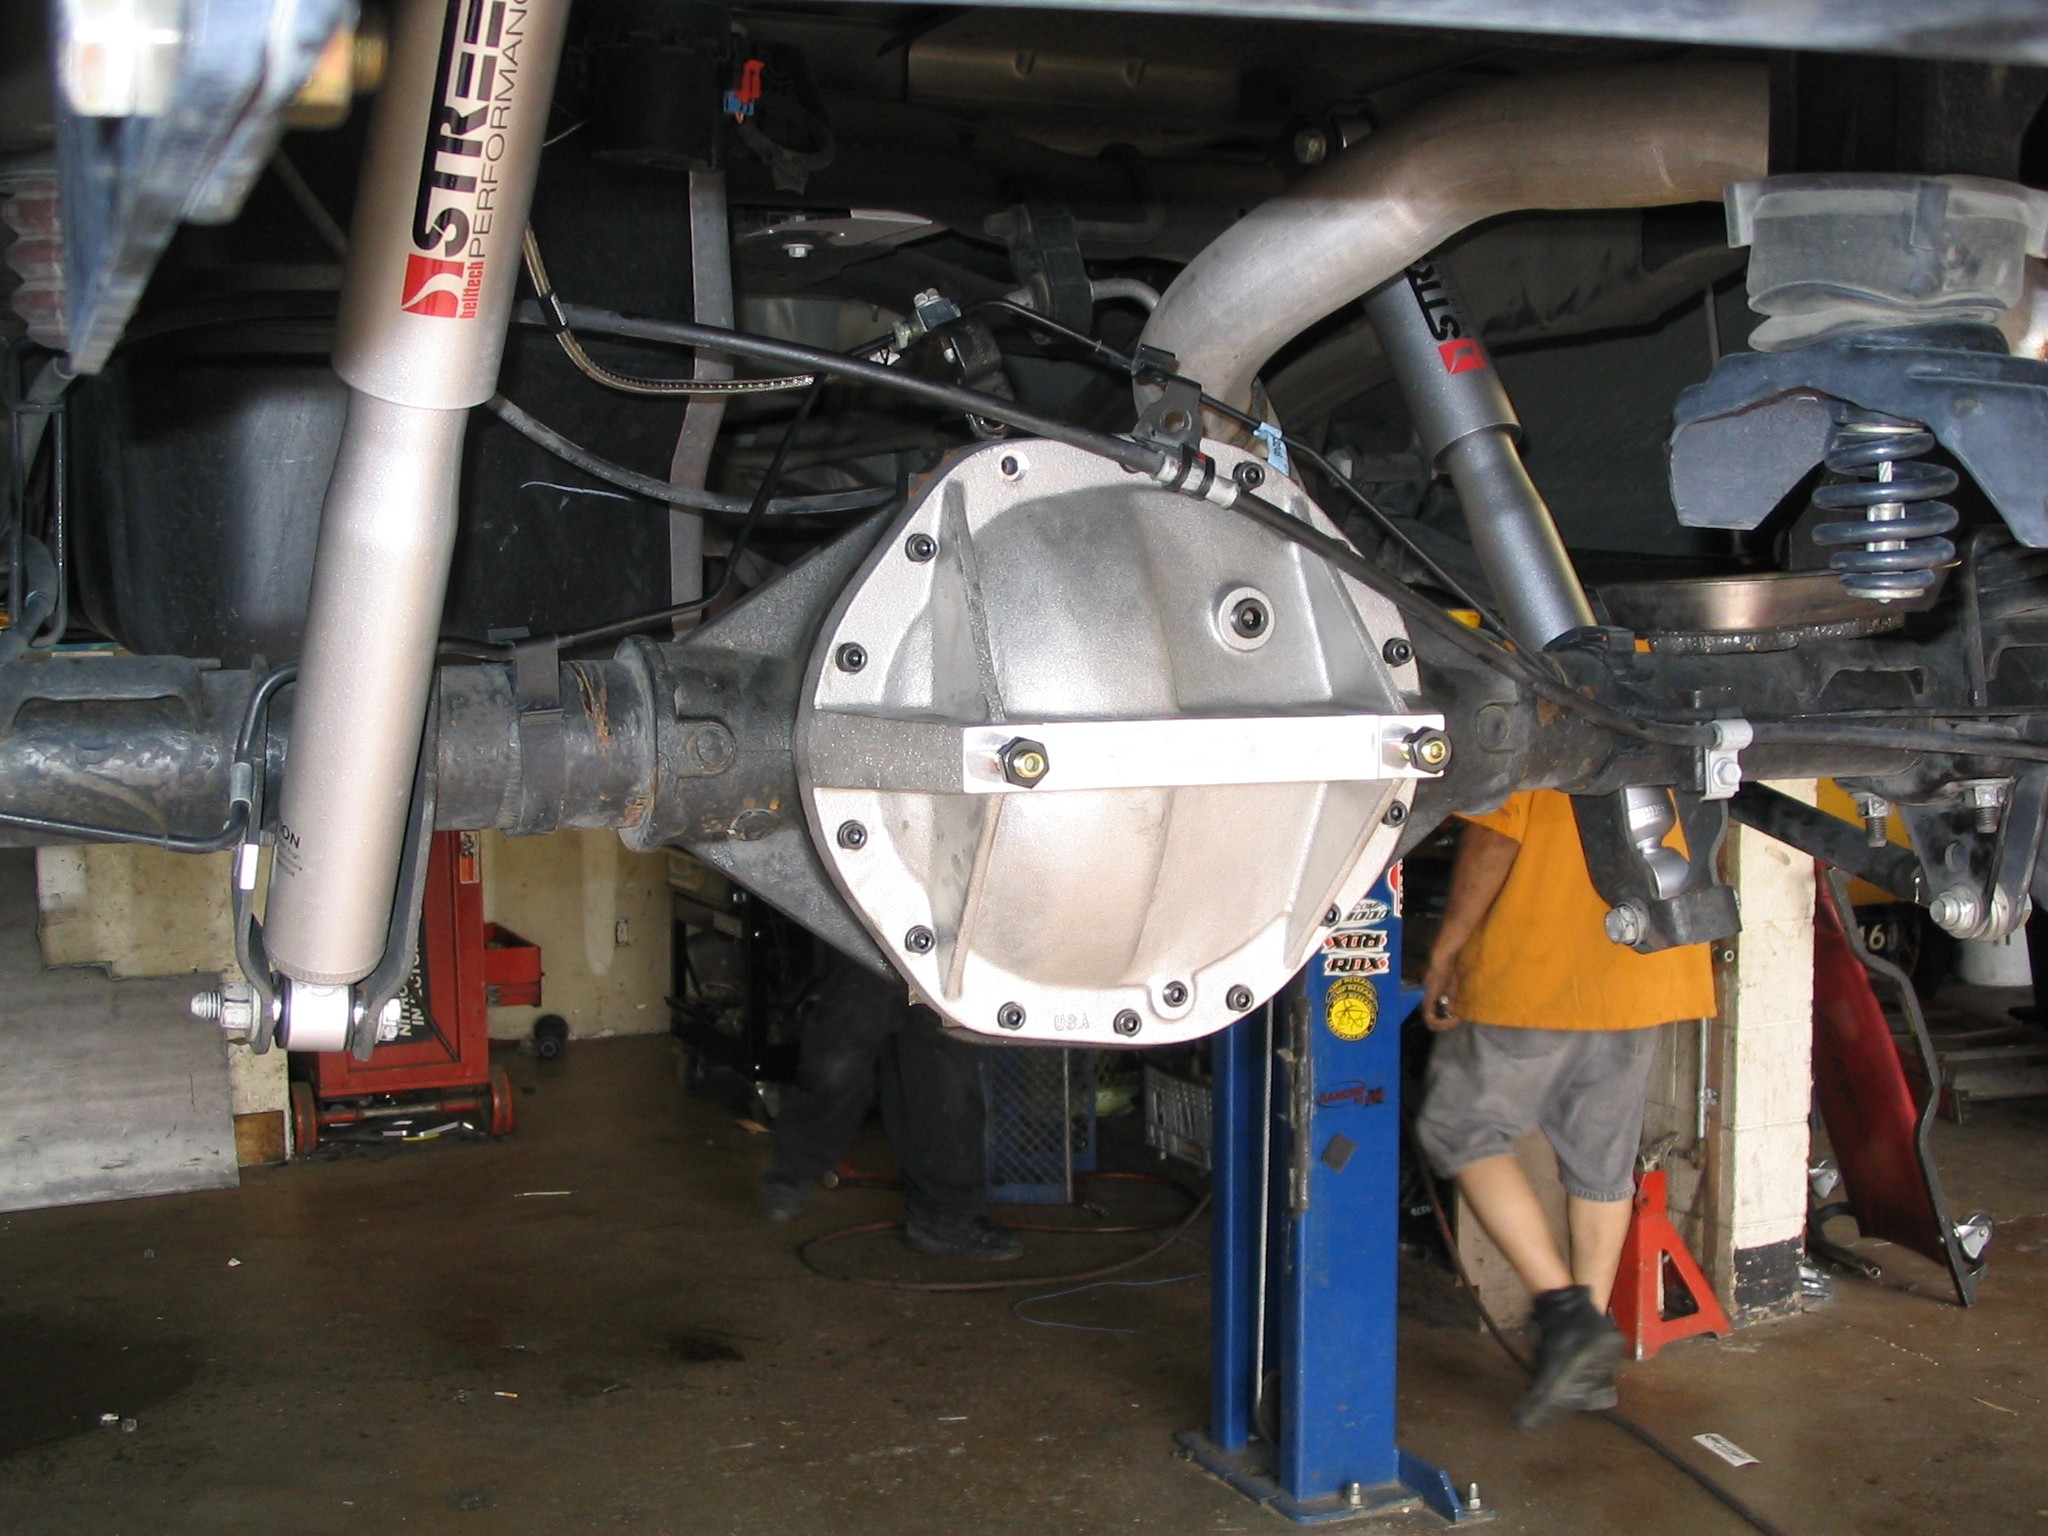 While I was at it I had my TA Performance Rear End Girdle and ARP Bearing Cap stud kit to help strengthen and cool the rear end. The added benefit of looking great is also a big plus.
Once again, for the observent people out there viewing this picture, this picture was taken before its installation was complete. Thats why the brake line is just kind of hanging there as well as the cover missing 2 bolts.
Where is the write up and pictures of the sway bar’s being installed you may ask. Due to the fact that a certain delivery company did not get them to me in time to have them installed at the same time as the lowering kit, the installation of them will be delayed until sometime in the near future.
Here is an after picture of my truck in pretty close to the same location as my before picture.
On to my impressions. First off, I believe that it does look nicer with its slightly lower stance, not to low for functionality yet still slightly noticeable. Onto performance. Now remember I went out of town for the install. Between the town that I live in and Lancaster there is a short cut road that has some nice tight turns. On the way there I once again put the Belltech Street Performance shocks to the test and they continued to impress me over my 2 year old Edelbrocks. I purposely drove hard into the turns to really evaluate how the suspension felt prior to installing the drop.
Now the ride home after the install. On I-14 the ride was still just as smooth as it was on the way down, which was to be expected. Then we came to the Garlock short cut. Again I drove hard into the curves to see if it felt better and to my surprise it did. Don’t get me wrong, I’m not saying that it was like night and day but I honestly did notice less body roll due to the lower center of gravity. Does it now handle better than my Monte Carlo SS? Umm, sorry to say but no it does not. It does however handle fantastic for a full sized extended cab truck with a camper shell.
On a side note, I don’t know if the drop had anything to do with it but I did get better gas mileage coming home than I did going down. Has anyone that has already lowered their truck experienced this? I know I drove just as fast as I did on the way down as well as hard into the corners. I’ll have to post this question on an on line forum I frequent, SilveradoSS.com and see what kind of response I get from the guys there. More than likely it was just a fluke but who knows. I’ll be sure to do a follow up with my findings.
As of this posting I have not hooked up the Champion bass boat to see how the suspension handles it but like I said before in my shock install post, I truly don’t believe there will be any issues. Here again, I’ll post a follow up a little later down the line.
I would highly recommend this suspension upgrade to anyone wanting to improve their performance and ride capabilities of their truck, trust me when I say that you will not be disappointed.
Thanks for visiting my site. Be sure to tell all of your fishing buddies and come back soon!
Until Next Time, Good Luck and Tight Lines To Ya!


